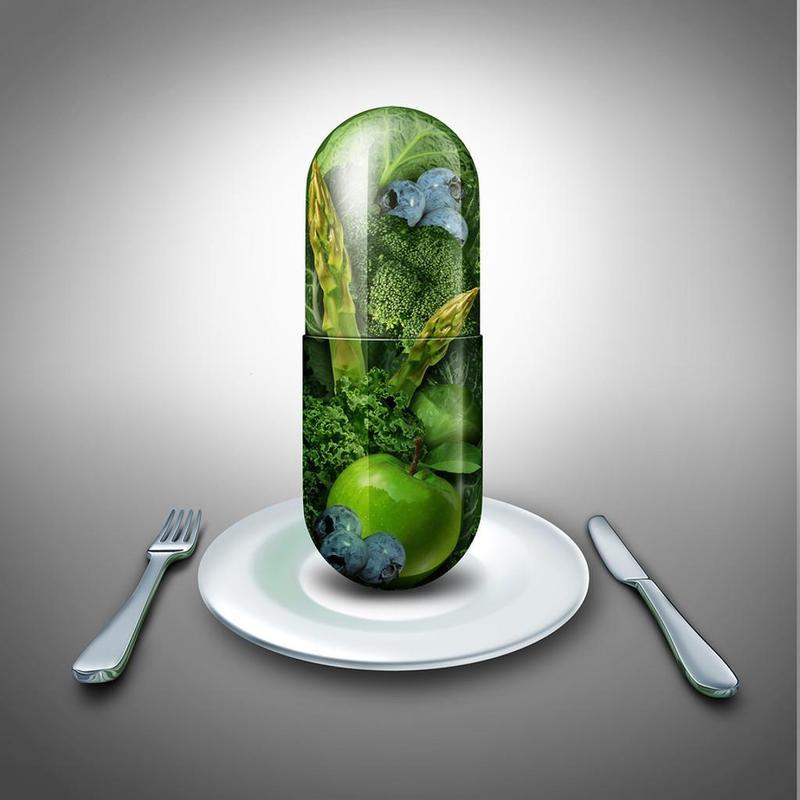
GAPS Intro Diet: Important Tips and Tricks for Success!
GAPS Intro Diet: Important Tips and Tricks for Success!
Are you familiar with the GAPS™ Diet?
It’s the gut healing protocol that makes a connection between the health of the gut and the health of brain/body, and uses carefully chosen traditional foods & preparation, natural detoxification, and basic but essential supplements to naturally heal the digestion and body?
Perhaps you have read the “Yellow Book” and you’ve been profoundly moved by your own body’s inner workings and have considered the protocol for your own family…but then overwhelm quickly set in.
The GAPS Diet can be so intimidating from the place of not having tried it…new cooking skills, new foods, WHEN do I do what, THIS goes way beyond any short term diet I’ve tried…
THE REALITY OF GAPS™ IS:
If you can have a sense of adventure and a little tenacity…it can be empowering, and life-changing.
Before we get into the tips and tricks about GAPS Intro, I’ll share a little bit of my own journey of empowering and life-changing.
Essentially my GAPS Story starts, before we were a family of six…I had the privilege of staying home with three beautiful kids, Cade, Jack, & Maggie…and life was pretty sweet and little people-centered.
But the BANK ACCOUNT OF MATERNAL HEALTH has limited funds, and having kids makes large withdrawals.
When our fourth little surprise came along…it drew down my maternal health bank account even further, and a postpartum infection coupled with another round of antibiotics…had me holding my notice of NON-SUFFICIENT MATERNAL HEALTH FUNDS.
Symptoms like these had me miserable…and anxious about my abilities to mother my four kids:
Migraines
Eczema
Thrush
Acne
Food Reactions
Aches/Fatigue
I tried numerous remedies and diets in the realm of real food…which “moved the needle” enough that I was encouraged, but I didn’t get as far as I hoped.
What I needed was a full protocol that went deeper.
In the middle of my struggles (painfully nursing my 4th baby, Charlotte), I found Dr. Natasha Campbell-McBride, a neurologist from the UK, and her protocol called GAPS, the Gut and Psychology Syndrome.
She was a wealth of medical knowledge, paired with traditional Russian wisdom, and she developed and used the GAPS Protocol to heal her small son of autism.
But I didn’t have autism, so what was the draw? The draw was that ONE protocol, with slight adaptations for bio-individuality, could naturally heal a plethora, a multitude, a myriad of issues if one used it consistently and properly. By addressing the root of the issue (the gut) one could let the body do its thing…which it does very well…taking care of us and healing.
The amazing thing was…my family of six had multiple symptoms that were all different, and we were able to address them ALL of them with ONE PROTOCOL. (Crazy enough, we did our first round of GAPS Intro while traveling the country in an Airstream travel trailer when our kids were little…so no excuses about kitchen space!)
In a moment of clarity and realizing that life is mostly what you make of it…we set a date to start GAPS, and the rest is history.
GAPS Can Help Everyone In The family, But Are You Confused About How To Start?
Should we do Full GAPS? Should we do Intro? How long will it take?
We’re going to talk about good strategies that apply whether you are a GAPS veteran, or a complete newbie.
What You’ll Learn:
An overview of the different parts of GAPS, & how they work.
Tips for the GAPS Introduction Diet
The value of setting a date and working backwards
My 3 measured approaches to the GAPS Intro Diet
How to know when to move on to the next stage of Intro
My scripts for talking to your kids
Overview of the GAPS™ Protocol
The 3 Main Parts Of GAPS:
Diet (Introduction, Full, & Transition)
Supplementation
Detoxification
In this article we’re focusing on the Diet part, and more specifically, just the Introduction Diet.
What The GAPS™ Protocol Does:
Treats the root issue…the gut
Gently cleans up and removes the flow of toxins
Removes hard-to-digest foods
Corrects nutritional deficiencies by…
Emphasizing healing foods
Restores your own immune system
How Long Does GAPS Last?
The GAPS Nutritional Protocol as a whole generally lasts for 1.5 – 2 years. You’ll be ready to start adding in some transition
foods when you’ve had 6 months with no symptoms. The Diet part is further broken down into:
6 Stage Introduction Diet
Full GAPS Diet
Transition off GAPS
What Is The Purpose Of The GAPS™ Introduction Diet?
The purpose of the Intro diet is to heal and seal the gut lining as well as the following:
Provides building blocks for the enterocytes, the cells of the digestive tract
The Intro diet is low fiber, which is gentle & healing
Foods are introduced gradually starting with gentlest first
Provides beneficial microbes
Holistic approach for diarrhea
Who Is The Introduction Diet For?
This is a really good question to ask, because not everyone needs to go on the Introduction diet…but if you are not resolving your concerns or issues after a time on Full GAPS, this can be your answer.
Diarrhea (of any origin), abdominal pain, bloating, flatulence, etc.
“Leaky gut” and inflammatory bowel conditions
Autistic children and all children on the spectrum or with learning disabilities, such as Down syndrome, cerebral palsy, etc.
Kids and adults diagnosed with diabetes type 1 or celiac disease (yes! GAPS can resolve these conditions)
Some cases of stubborn constipation (children in particular)
Multiple food allergies and intolerances, as the gut lining is very damaged and needs slow healing
Or if you have health issues that aren’t resolving on Full GAPS
Who Should Start With Full GAPS™?
Full GAPS is the less restrictive part of the GAPS protocol. I recommend, if you are able to, to start with Full GAPS first anyway, to adjust to a new way of eating, and to new cooking skills. This will ease your transition into GAPS Intro later on…which I will talk about further.
Chronic constipation is an issue…handle that first on Full GAPS
You are breastfeeding or pregnant (Intro is too detoxing for those pregnant & breastfeeding)
You travel a lot (consider Full GAPS foods first)
You don’t have a lot of “real food” experience or are intimidated by the new skills to learn…Full GAPS is enough of a learning curve
3 Approaches To The GAPS Diet
I have three different schedules or “approaches” to starting GAPS, depending on what situation you find yourself in. Determine what fits you and your family best.
Your success and what you gain from GAPS depends on good preparation. The level at which you apply yourself to this…your approach…allowing time, space, practical effort, all determine how much success you will have. Pick an approach, put the tasks on your calendar, dive in, and have fun.
The 3 – 6 Month Approach:
BEST FOR: the family or individual just learning about traditional foods and natural living, who has a lot of processed, standard American foods in their fridge and pantry. In this approach, you’ll be putting tasks on your calendar by the month, or week.
Step 1: Real Food – take a month to just remove processed foods and to learn how to replace them with traditional home versions. Use Google search terms for online recipes like “Paleo”, “Grain-free”, “Primal”, or “Real food”.
Step 2: Remove sugar & grains – start baking with fruit or honey, searching for grain-free recipes.
Step 3: Full GAPS – Take a month to transition to full GAPS, one meal a day. So it can look like this:
1st Week – 1 GAPS meal/day (breakfasts)
2nd week – 2 GAPS meals/day (lunches)
3rd week – Add GAPS snacks
4th week – Full GAPS (breakfasts, lunches, snacks, dinner)
Step 4: Six Stages of Intro in reverse – so before going through the GAPS Intro diet, back into it, starting with Stage 6, then 5, 4, 3, 2, 1 and then moving forward.
Step 5: Six Stages of Intro – proceed as normal through the stages of the Introduction diet.
Step 6: Full GAPS – and finally you are on Full GAPS for the duration of your GAPS adventures!
The 1 Month Approach:
BEST FOR: the family or individual who has a good understanding of real and traditional food, who is ready to take their health to the next level but still wants to take a measured approach. In this approach you’ll be planning tasks on your calendar by the day.
Step 1: Click here to Download my 30 Day GAPS Prep Checklist. It will help you to cover many basic GAPS skills in an incremental way.
Step 2: Transition for a month – as in Step 3 above, take a month to transition to Full GAPS – one meal a day. Again, it can look like this:
1st Week – 1 GAPS meal/day (breakfasts)
2nd week – 2 GAPS meals/day (lunches)
3rd week – Add GAPS snacks
4th week – Full GAPS (breakfasts, lunches, snacks, dinner)
Step 3: Start Intro – beginning with Stage 1, go through the 6 stages of the Introduction Diet.
The “Next Week” Approach:
BEST FOR: those with severe digestive issues, children with Autism, children or individuals in pain & distress, who need to do this, yesterday. In this case, you don’t have the luxury of a measured approach.
Also for those who happen to like the “cold turkey” approach, but not what I recommend unless you need to.
Step 1: Clear the calendar – of social engagements and anything not absolutely necessary
Step 2: Take some time – a long weekend at least, 5-7 days off of work/school is even better
Step 3: Download my “5 Days” Intro checklist & menu – this will give you a menu and grocery/supply list that will get you through the first five days of the GAPS Introduction diet, which are often the hardest.
Step 4: Order the Heal Your Gut cookbook – a beautiful cookbook that includes recipes for all six stages of the Introduction diet, as well as Full GAPS recipes.
Step 5: Prep at least 1 day ahead of yourself – when you are detoxing or needing more rest and recuperation, it is important to NOT run out of food! At breakfast on Friday, think about what you’ll eat for Saturday breakfast.
GAPS™ Intro Practical Tips
Food Sourcing:
Food sourcing is something near and dear to my heart…an important conversation that we talk about a lot in the GAPS Class.
Engage with your food sourcing
Get to know your local farmers
Spend a day evaluating your budget & pricing your local food
What if you live in a food desert? Here are some sources to begin looking through:
http://www.localharvest.org/
www.eatwild.com
www.pickyourown.org
www.localfarmmarkets.org
Meat Stock vs. Bone Broth
On the GAPS Intro Diet, we do 30 days of meat stock first, before incorporating bone broth. Meat stock has less histamines and glutamine and when there is leaky gut, there is very likely a compromised blood-brain barrier and a strong bone broth can cause issues at first.
Chicken stock is especially gentle for Intro.
The difference between meat stock and bone broth is this…meat stock is made by boiling a cut of meat on the bone (like a whole chicken or a bonein roast) in water for a short period of time (say about 2 hours) whereas bone broth is made with all kinds of bones, for a long simmer (2 – 48 hours)
Meat stock is easier and gentler in the beginning of GAPS Intro, bone broth is more therapeutic.
This article goes into detail about the important differences.
Speed Up Your Healing By Adding These Foods Often
These foods provide some of the best healing for the gut lining and immune system, they need to be consumed with every meal if possible.
Bone marrow
Gelatinous soft tissues around the bones, skin, etc.
Animal fats
Organ meats
So…an example of the way that we did this as a family is that after boiling a whole chicken I would collect the soft tissues (skin, fat, etc.) and combine them in a blender with salt and pepper. This made a creamy pate’ that could be added to soups & stews for extra flavor and reparative nutrients.
Time Saving Tips
I get a lot of questions about ALL the cooking time…keep one pot of soup on the stove for the day…it is okay to reheat throughout the day if you are home (unless there are histamine issues). I can’t stress this enough…when you have detox brain and are feeling foggy headed…you don’t want to make it worse by going hungry.
Keep food prepped. Stock up on ghee, meats/bones, frozen veggies, animal fats and butter, 24 hour yogurt and kefir, and quarts of sauerkraut (they keep!). Also read my article https://www.honestbody.com/feeding-a-family-gaps-style/
Make 2 meals from 1
Plan 24 hours in advance for every meal
Chop a week of veggies at a time & freeze…a big time saver
Prepare in little ways everyday
Basic Foods To Have On Hand
These are the basic foods to have on hand when you start GAPS Intro. Most of them can be well stocked up on.
A variety of meat/meaty bones & fish
Fats (tallow, lard, ghee, duckfat)
Yogurt & kefir (24 hour fermentation)
Prepared meat stock
Sauerkraut
Vegetables
Eggs
Extra Virgin Olive oil
Basic Supplements To Have On Hand
While the first two of these are not technically supplements, they act as helpers and digestive aids.
Lemon water in a.m. (great boost for the liver and morning dehydration)
Ginger tea (helps soothe tummies and digestive aid)
Probiotic – like BioKult or GutPro
Cod liver oil – get the most unprocessed & high quality you can get
HCl – hydrochloric acid for beginning digestion well (alot more on this in the GAPS Class)
Magnesium glycinate – can help constipation on Intro
EFA supplements – fish oil, oils containing gamma linolenic acid (borage, black currant seed oil) etc.
Supplements & Medications On GAPS Intro
In general we take a break from ALL supplements on the GAPS Intro Diet, with two exceptions, and gradually add in what is needed.
Stage 3 – probiotics & cod liver oil are added in
Stage 4 – other EFA supplements like fish oil, borage, black currant, etc.
Exception: Prescriptions…need to be weaned off under practitioner’s care
Exception: If digestive help is needed during Intro, then we would employ things like HCl
Basic Equipment For GAPS Intro
If you are on a budget, this is a list of the most basic equipment…this is all you really need to get started with GAPS Intro.
Stockpot & good pan (cast iron or stainless steel)
Good knives & cutting boards
Inexpensive juicer (like Jack Lalanne)
Stick blender (like Cuisinart Smart Stick)
Mason jars (assorted sizes)
Bonus Equipment For GAPS Intro
However, if you have the budget and want to make things easier and have more palette fun…this is a list of my personal favorites:
Omega J8006 Juicer (or better)
Vita-Mix or BlendTec blender
Dehydrator (like Excalibur)
Stand mixer (like KitchenAid)
InstantPot or Vita-Clay (makes really quick and tender meats/stocks and more)
Food Processor (like Cuisinart)
Air-lock fermenting vessels (like Pickl-It or Probiotic Jar, especially good for those with histamine issues)
Common GAPS Intro Issues
There are a few common issues that come up on the GAPS Introduction Diet. Here are tips to remedy them.
Stubborn Constipation
I also have a whole menu of constipation remedies in the GAPS Class!
Add in fresh pressed carrot juice in Stage 2
Take with cod liver oil
Enema if no bowel movement in 2 days
Diarrhea
For those dealing with diarrhea on Intro, it is important to stay put on the stage you are at, until it resolves.
Stay on current stage
If it is profuse and watery, eliminate veggies
Use the probiotic BioKult (has strains that are especially good for diarrhea)
Nausea/Vomiting/Low Blood Sugar
This is especially common in younger children, and even more so in those who have not been eating Full GAPS first for awhile.
Have tiny sips of fresh pressed juice (like carrot or apple), just enough to stabilize blood sugar
Mix 1⁄2 and 1⁄2 coconut oil (or ghee) with raw honey and nibble on it every 30-60 minutes
Eat often, don’t stick to strict mealtimes
How Long To Go Through GAPS Intro?
These are general guidelines for time frame. However, if you have many food sensitivities, or are one of the more severe cases (like the kind requiring starting GAPS next week), then I suggest 1 new food every 3rd
day on Stages 2 – 4.
Stage One: 1 – 2 Days (unless diarrhea)
Stages Two – Four: Add in one new food at a time, 4 – 7 days each stage
Stage Five: One new food every 1 – 3 days
Stage Six: One new food every 1 – 3 days
In Stage 5 we add in raw vegetables…this can be a long list, so start with what is a. soft, b. seasonal, c. local. And the same goes for Stage 6 in which fruits are added in. Introduce one new food at a time.
by Sarah For The Healthy Home Economist
Be the first to post a message!